Showing posts with label Design. Show all posts

Wednesday, July 10, 2013

It’s Done! Really!

The other building I had to tend to on my trip was our Fairview, TX building. I went down there in April with my colleague Bri for a day and a half, because we were told it’d be ready by then.

It was not. It was a mess of contractors, grouting tile, touching up paint, installing doors! It was a mess.  We went down for Monday – Tuesday and our first event was that Friday. It was insane. Par for the course really. So we couldn’t place any furniture or stage anything at all, so we hung artwork. Amid construction dust and careless subcontractors we dared to put up our art.

But it was all we could do. Luckily, Fairview and Richardson are like 15 minutes away from each other, so this trip I was able to go back to Fairview, add some finishing touches and see it clean and polished. It’s such a different feel but it’s the exact same floorplan. That’s one part I love about my job. The shell is the same each time (relatively), but we can achieve several different ambiances through what we put inside. Lighting, finishes, mouldings, furniture, and artwork change EVERYTHING.

Bri was mostly responsible for the finish selection in this one, as I was on maternity leave at the time, and she did a stunning job as always. I was there to help with lighting, furniture, art and everything else. I was so grateful she was able to come with me to help out. So here it is, same building – different feel.

Reception Lobby

DSCN3148

DSCN3151

Hallway

DSCN3157

DSCN3156

Game Room

DSCN3171DSCN3180

DSCN3176DSCN3178

Ceremony Room

ShowDBfile (2)

Bride’s Room

IMG_2432

DSCN3167

Main Hall

ShowDBfile (1)

Back Lobby

DSCN3160DSCN3163DSCN3162DSCN3159


It’s not often I get to go and see each building ALL the way done, so I was super excited to get the chance to do that this time. Every time is different and exciting and stressful, but we always manage to pull it together eventually.

K I’m done with Noah’s posts. Like I said, this is mostly a record for me to keep. I hope you enjoy the pretty pictures if nothing else!

Tuesday, July 9, 2013

It’s Done! Mostly…

So this last week was insane, and if you’re friends with me on FB, you’ve already seen some of the pictures, but I kind of wanted to add them here too, along with my own personal narrative of everything that went wrong.

So much, guys. So much.

For example, I show up Monday morning and there’s no sink in our game room. The sink we specified is discontinued. I have to find one NOW. I find one that’s available in Utah; problem is, I’m in Texas. So we call one of our Noah’s employees and ask him to go get one, and rush ship it. He calls an hour later and says it’ll be here Wednesday. Check.

Tuesday, they’re putting up the acoustical panels. Wait…guys…they’re ALL the wrong size! ALL OF THEM! The trim carpenters had already trimmed out where they should go, but not one of them was the correct size. Most of them we could re-trim out. Four of them were ridiculously too big. So I dig in. I tear back the fabric, re-measure, re-mark them, and take them to our contractor with a table saw. He cuts them down, I cut the fabric, re-adhere them, and stick them up. Hallelujah! They fit! Check.

Wednesday morning comes with the sink. The ridiculously DIFFERENT FROM IT’S PICTURE sink. It doesn’t even have a prayer of fitting into our base. I talk to the contractor and we decide to throw a countertop on with an undermount, if we can get it done by our first wedding in two days. By some MIRACLE the stone guy says he can do it Friday morning. 4 hours before the first wedding.

Those were the big ones. Installs are always crazy because each day  lasts like 12-14 hours and you’re going non-stop. We also had to run to the other building in the area to finish it off, since I was so rushed last time. So between trips to Pier 1, Home Depot, and Target (don’t judge) we finally were able to finish off my baby. And I couldn’t be happier. So drumroll….here she is (LOTS of pics, bear with me):

Reception Lobby

IMG_2462

Hallway

DSCN3241

Game Room

IMG_2461

Ceremony Room

IMG_2463

Bride’s Room

DSCN3258

DSCN3247

Back Lobby (ignore the random guy…and the roll on the floor…Hey I said it was MOSTLY done)

IMG_2465

Main Hall – Reception Room (after the wedding, I think…)

IMG_2464

Exterior

IMG_2466

Sigh of relief.

The good news is, we’ve gotten rave reviews so far. Which makes me so happy. I love knowing that the space is being enjoyed and used by people on one of the most special days of their lives.

Cue the warm fuzzies.

And the exhaustion. I’m still recuperating. Now on to Noah’s #8!

Monday, June 17, 2013

Dreaming

This week I decided to torture myself and go pretend house shopping. We are in no position to sell or buy or do anything right now, but I occasionally get curious about what’s out there, just to see.

Bad Idea.

I found this beauty that is calling my name:

l1a322144-w0xl1a322144-w2xl1a322144-w4x

Siiigh. It’s not huge, or even RIDICULOUSLY expensive. Just more than I can do currently.

But I love it so much. So then I got to thinking about what I would build, if I could build from scratch, which let’s face it, is my REAL dream. And I realized I need to find a way to become super successful at something so I can afford my dream house.

I have a Pinterest board called Dream Home Ideas with over 350 pins on it. Maybe I need to narrow down.

But I don’t think I will, because that’s what dreaming is about, right?

What about you? Do you ever dream about what you would do, if you could do ANYTHING?

Happy Monday!

Thursday, April 11, 2013

A New Look!

Welcome to the new blog! I was getting bored with my other one so I decided it was time for  a fresh new look. I hope you like it! I have been gravitating to this color scheme for awhile now. I keep seeing it pop up in things I do.

Another fun new thing I added was a link to my Pinterest page, over there in the sidebar. I know, I’m slow. But I’m excited to share this with you guys because I pin…A LOT. As you can see, if you click that little button right thurrr. Anyway, if you want to see how a designer’s brain works, follow me. I brainstorm and organize all of my Noah’s projects there, as well as book inspiration, and just funny things that I find.

For example:

a63c562d35fa3bc57a4986955de69c5c

Been there, done that.

Anyway, I hope I’m not setting a precedent by blogging three days in a row, but it seems once I stopped putting so much pressure on myself to have perfect planned-out posts, it became fun again. Sorry for you guys…

Welcome to my crazy! Muahaha!

Tuesday, October 9, 2012

Where I’ve Been…

Is it bad to say “In the bathroom?” Well, not for the reason you’d think. We’ve gotten into remodeling again. It seems like it’ll never end. But we are one step closer to having gutted every room in the house. This one was a challenge. We weren’t planning on re-doing the bathroom. But then we discovered a leak from the bottom of the toilet. We thought, “okay, we’ll replace the wax ring and be done.”

I don’t think either of us really believed that.

Sure enough once we pulled up the toilet, we saw that not only was the wax ring disintegrating, the sub floor under the carpet (yes, carpet) was rotted to the touch.

Cue the stress. Suddenly this little job became HUGE. We could replace the floor and stop there, but if we’re going to take everything out, which we need to, why not fix the walls? If we’re going to fix the walls, we might as well get a new vanity, and chuck the old one. And so on, and so forth. Until at last, this:

004 

turned into this:

002

and resulted in this:

003

Yes, I made the last picture bigger than the rest.

I’m kind of over the moon about it. I’ve never gone into designing a room without some sort of plan, or inspiration piece. Until this. I had to figure out SOMETHING to cover up those walls. I didn’t want tile again, and I couldn’t afford to re-drywall. So we went with beadboard. I absolutely love how it looks. We ended up running it vertically for the bottom 36” and horizontally for the top 16”. Why our bathroom was tiled up to 52 1/2” I will never know, But we found a way to fix it, and that’s what matters.

I won’t go into all the dirty details, but I’m so so happy to share the end results!

cabinet-b&a

lights-b&a

shower-b&atoilet-b&a

snapshots

Those shadowboxes are the drawers from our old vanity. I painted them, cut down the glass shelf from our old medicine cabinet to fit inside, and backed it with the same fabric I used for the curtain. Which was, in fact a shower curtain that I cut down. I’m not a great seamstress, so I used the loops that were already done on the shower curtain for my rod. Then I just sewed weights into the bottom hem, and sewed up the side. The artwork are just some inexpensive frames from Wal-Mart and then scrapbook paper and letters I had.

I’m so glad it’s over. And now I won’t be embarrassed to let my guests use the restroom!

And one day, I will get on a regular blogging schedule again. Until then, thanks for hanging around and being patient with me. Congrats to all those writers out there who are getting good news too! Agents, and book deals, and cover reveals, oh my! You all are an inspiration.

I think I’m finally getting back to a place, mentally where I can write again. I’m even flirting with the idea of NaNo this year. I have another idea…

Hope all is well in the blogosphere! Happy Tuesday!

Tuesday, July 17, 2012

Check It Out!

This post is a little outside my normal realms of bloggage, but it’s concerning graphic design (kind of) so I figure I can count it under the design category (sorta). Whatever, I’m just excited about it.

So I just finished putting together a branding package for a friend of mine who’s starting up her photography business, and I have to say I’m pretty excited about it. We worked together to design her logo, letterhead, business card, and her website. She was great to work with and super patient with me, and she knew what she wanted. Which is always nice.

Anyway, here’s what we came up with for her branding package:

Branding-Package

And to see her website you can check her out here. (see the follow button? I’m sure she’d love for you to click it!)  She’s just starting out, but she’s really amazing. She took pictures of my girls for me when my littlest was just 2 weeks old and she was FABULOUS. She’s going to do some family shots for us in the fall when Baby B is a little bigger and can, you know…sit up.

Anyway, here’s a sample of what she did for me:

IMG_2773-1IMG_2855-1IMG_2830-1-2

Priceless right?

Anyway, if anyone in the Salt Lake area needs a photographer, I highly recommend her! And if anyone needs blogger design help or some branding of their own…email me in a couple months. lol. No really, I’d love to help. I love doing it.

That’s all for now! Happy Tuesday!

Friday, March 2, 2012

Grand Finale and a Short Goodbye

This is my last remodel post (collective sigh of relief from the interwebs) and probably my last post at all for the next 6 weeks or so. I'm officially going in on Monday to be induced (inner sigh of relief from me). So I'll be busy with the occupant of this newly designed room, and I hope you all will be here when I get back! Anyway, onward and upward.

I hope you’re not tired of seeing remodel pictures yet, because this one’s probably my favorite from our latest round of renovating. I told myself that if we were having another girl, I’d leave the nursery alone. It was fine, it was girly, it didn’t need anything else. It was foolish to spend money on it. (For THOSE before and afters, go here).

Then I thought, well, maybe I’ll get some new bedding at least. What’s new bedding going to hurt?
Then I saw this:
banana-fish-bananafish-gia-four-piece-crib-bedding-set-91573-374931904899997

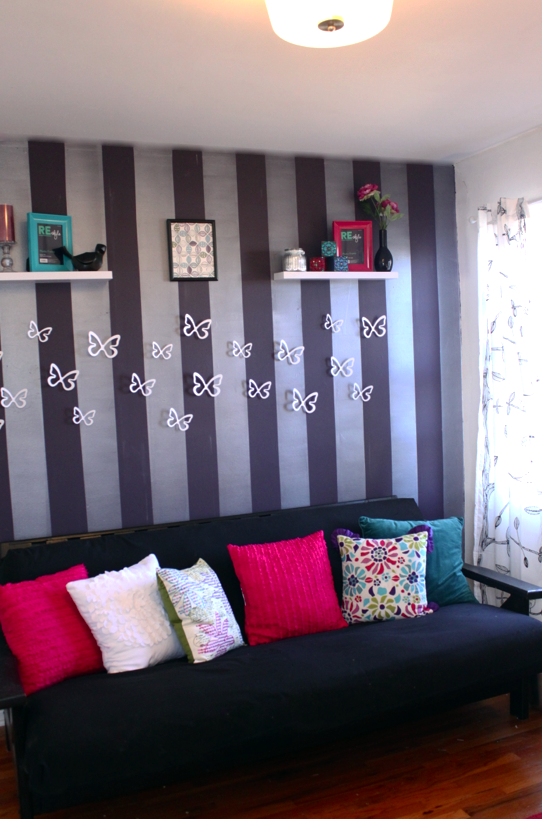
And I fell head over heels. But wait. It’s plum. Like DARK plum. That doesn’t match a pink striped wall! Well, we can paint the wall easy enough, right? But what about the pillows? Those don’t match either. And the curtains are out of the question!

Suddenly, I was doing a new nursery in my head. And once its in my head, ladies and gentlemen, it must be realized. Or I get a little…cranky. So with this bedding set as the jumping off point, I plotted and planned and paint-matched and finally ended up with my new favorite room in the house. Which, really, nurseries are more for the mom’s than the babies right? I mean I’m the one who has to sit in there looking around for hours.

Anyway, I’ll shut up now. These pictures are also from Danielle Oakey, bless her soul.


Plum makes me happy. There’s so much in this room that makes me happy. The jewelry holder that I’m using for hair bows, The framed scrapbook paper above the changing area, the little ceramic owl peeking out from the bookcase, and the lampshade that was supposed to be a pendant light from IKEA (you can see a glimpse of it in the third-to-last picture).

So while the furniture stayed the same, and the layout stayed the same, this room feels completely different. And now, I have pictures to put in baby A’s baby book of her new room that aren’t identical to her big sister’s. And that makes me happy too. Now I just need her to get here so I can put into that amazing bedding. Not too much longer now…

Happy Friday!

Tuesday, February 28, 2012

Interior Tuesday: Transforming a Toy Closet

Our home is full of closets. As in, we have 3 real bedrooms and 10 closets throughout the whole house. It’s nice to have so much storage, especially when we decided to convert our basement office into E’s bedroom. This room has a huge under-the-stairs closet that had seen better days. For example:

004

This is what it looked like when we first toured the house. It pretty much stayed that way when we moved in except we had less board games and more…junk in there. Office paper, luggage, air mattress, etc. It wasn’t pretty, but it was space that got filled.

Well, when planning out how to do the new bedroom, there was one obvious transformation to me and it was to take this dingy, scary basement closet and brighten it up so my girl could read and play and laugh and enjoy herself in there. Who, as a kid, didn’t want a place to hide and pretend?

So once the room was finally cleared out and we found new homes in our other nine closets for our miscellaneous junk, I began the arduous process of painting this cavern-like space. At 6-months pregnant BTW. I don’t think it helped my hip in the least. Nonetheless, it needed to be done and I had a vision.

Unfortunately at the time I did not have a camera, so my vision is shared with you courtesy of my iPhone camera. Not great. But you get the idea.

009

First, I cleaned the beast out and prepped it for painting.

011

Second, I ripped off the old shelf liner and practiced adding the new liner on the top shelf. I actually found this cute green striped pattern at Wal Mart for $5 a roll. I used just under two rolls total.  It went on pretty smooth, but I didn’t want to get paint on it, so I held off doing the rest of the shelves until it was painted. I proceeded to prime all the walls with white primer and then a coat of white paint.

I knew I wanted to add some kind of visual interest to the back of the closet as well, so I taped off a lattice-like pattern on the top three shelves. The bottom was too low for me and I knew it’d be covered up anyway, so I didn’t bother. Also, you can tell, I didn’t measure these angles. They’re a little wonky in places, but oh well.

012

I painted over the top of the tape with yellow and before it dried all the way I ripped off the tape. Now this is not normal drywall, it’s some kind of horrible wallboard that isn’t smooth or straight, so there are some obvious deficiencies. But we work with what we got, right?

After that, I finished lining all the shelves and started to move stuff in. And Voila! It turned into:

016

Toy Heaven! I used our leftover carpet remnant to cover the concrete floor and threw some pillows in there for her to sit and play comfortably on.

Screen Shot 2012-02-24 at 1.02.51 PM

I also used her drapes from her old bedroom and a staple gun to make a sort of fabric ceiling to cover up the ugly underside of the stairs. It softens the whole area and adds some interest. Also it didn’t cost me a dime, which was awesome.

018

And just to add one more dimension of fun, I painted the outside of the doors with more chalkboard paint:

Screen Shot 2012-02-24 at 1.03.03 PM

It added a pop to the big white wall that I was missing, and provides her with yet another opportunity to be creative, which I’m all about.

And there you have it! She gets a private place to play and I get all her toys out of my living room, which totally rocks. So far it’s been a hit with her and any other kid that comes over. Is it bad that I’m a little jealous that I never had this when I was a kid? Ce la vie. At least I got to design it for her.

Hope all is well in the blogosphere and have a Happy Tuesday!

Related Posts Plugin for WordPress, Blogger...